Followers

Thursday 31 August 2017

Be Glamorous by Stamps By Me

Hi everyone xx

I'm back again with another DT sample to showcase the beautiful new
Be Glamorous stamp set by Stamps By Me 

Also used :
Distress Oxides : Fossilized Amber, Iced Spruce, Peeled Paint
Kuretake clean colour pen: yellow
Black onyx versafine
Masking tape
(Dash and dots stamp from my crafty stash )


  • Use masking tape to create a panel to the right of your card blank 
  • Blend the Distress Oxides,  spritzing with water and drying in between each colour 
  • Use the same colours to stamp the dash and dots
  • Remove masking tape 
  • Stamp the flower in black onyx versafine ink, including part of the stamp coming down from the top left of the card blank
  • Use the yellow kuretake clean colour pen to add a hint of yellow to the flower petals
  • Stamp the sentiment in black onyx to complete 
A simple but effective card 

Many thanks for popping by 
Crafty hugs xx 

Oh Happy Day... by Stamps By Me

Hello everyone

I hope it will be an oh happy day..for you too 😊

Here's a sample using the new
Oh Happy Day stamp set and
Paper Stitch Frame die
Both by Stamps By Me 

Also used:
Coloured papers/card
Black onyx versafine
Kuretake clean colour pens
Black pen


  • Cut two solid frames in two colours of your choice.  Adhere first to card blank and draw around it with a black pen.  Adhere second, at s jaunty angle, and draw around this to
  • Stamp the sentiments in black onyx versafine 
  • Cut a third, smaller solid frame and stamp the flowers in black onyx versafine 
  • Colour in using your pens
  • Adhere using foam pads to complete your card
Another quick but beautiful card to make.
Would also look great in monochrome papers

Many thanks for popping by 
Crafty hugs xx 

Bee Crafty DT - Card Samples

A very good morning everyone.

Hope you're all well and have a lovely day planned xx

I'm back with my Bee Crafty weekly blog for Buzzy Goings On At Bee Crafty Blog  

Today I'm sharing my card samples made for the new products being showcased tomorrow  on Hochanda. So here's a seek peek just for you!!
 How much do you love these stamps. ..I love a bit of the "dark" side lol.

My samples showcase the following stamps :
Skull Background
Skull
Trick or Treat 
Danger Poison
Pocket Watch
Wildflower 2
TIME
Life &Rain
Time Flies
Cogs

Also used:
Inkables : Brick Wall, Circles
Dinkables : Chain Link
Distress Oxides : (DO) Fossilized Amber, Iced Spruce, Wilted Violet, Peacock Feathers, Picked Raspberry, Twisted Citron
Distress Inks : (DI) Spiced Marmalade, Brushed Corduroy, Walnut Stain
Versafine : Black onyx, Smokey Grey,  Vintage Sepia
Pixie Powders
Clear Embossing powder
Versmark
Kraft paper bag
Black spider Web
Tag die


  • Cut a square black mat and a slightly smaller square green mat
  • Stamp first skull in black onyx versafine ink. Mask and stamp second in smokey grey versafine ink.  Mask second skull and stamp third in Iced Spruce DO. Leave masks in place
  • Ink through Circles stencil with Iced Spruce DO
  • Pocket Watch and Danger Poison were stamped in Twisted Citron DI. 
  • The Trick or Treat was stamped to complete 


  • I used the same design on this matching gift bag and card, beginning with the Skull which was stamped in the Vintage Sepia and then masked off
  • I blended the Brushed Corduroy DI through the Brick Wall stencil 
  • I inked through the Circles stencil with Fossilized Amber DO and the Chain Link stencil with Peacock Feathers DO. I added a few highlights on the circles with a brown pen
  • The Wildflower 2 were stamped in Walnut Stain DI and Peacock Feathers DO
  • On the card I stamped the TIME part of the stamp on the Peacock Feathers and the rest in Walnut Stain 
  • For the bag, I cut a tag with my die, inked around the edge with Brushed Corduroy and attached with ribbon


  • Cut a white card mat slightly smaller than black card blank and stamp Skull background randomly in Peacock Feathers DO.  Adhere to card blank
  • Cut smaller square of black card and slightly smaller square of white card.  
  • Stamp the Skull on the white card, in Peacock Feathers DO 
  • Stamp the two sentiments in black onyx versafine ink 
  • Adhere this to black mat then adhere to card blank 


  • Cut a black card mat slightly smaller than card blank and a white one slightly smaller than that
  • Stamp Skull in black onyx versafine ink and mask off
  • Blend Fossilized Amber DO through the Brick Wall stencil and Wilted Violet DO through the Chain Link stencil 
  • Stamp Danger Poison in black just over edge of skull
  • The Pocket Watch is stamped off the edge of the card,  on the right hand side, in Spiced Marmalade DI
  • The sentiments were then stamped off the right hand edge, in the black versafine and the Wilted Violet DO 
  • The LIFE stamped next to the skull was in the black versafine 
  • Remove mask from the skull and assemble the card


  • Using masking tape, mask off a square panel
  • Blend Spiced Marmalade DI, in varying g depths of shade
  • Stamp the Danger Poison in the same colour, using first and second generation stamping  (ie don't re-ink but stamp a second time to achieve a lighter colour)
  • Stamp one of the stamps from the Cogs set, in Iced Spruce DO.  Dry off with heat gun
  • Stamp skull and LIFE in black onyx versafine
  • Ink part of the Skull Background stamp around the edges to create a decorative frame
  • Carefully peel of masking tape to reveal the final card  


  • Cut a black card mat slightly smaller than card blank and a white card mat smaller than this 
  • Using Pixie powders create a background.  Dry off with heat gun then stamp Danger Poison in Wilted Violet DO 
  • Cut the background into 3 equal strips and adhere to black card and then onto card blank
  • Adhere some black spider Web on the background 
  • Cut another piece of black card and a slightly smaller piece of white card, and stamp the skull background in Picked Raspberry DO. 
  • Adhere with foam pads
  • Stamp the Danger Poison stamps 4 times on white card and cut out. Ink with Versmark and heat emboss with clear embossing powder. Repeat this 3 times (triple embossing)
  • Put in freezer for 5 minutes,  take out and "crack" immediately  (creates a lovely crackle effect)
  • Adhere two under the topper with wet glue and two with foam pads, to add height
Phew...and there we go!! That's my card samples for the recent show. You can tell from the number of samples I made just how much I loved working with these. I hope you like them as much as I do

Thankyou for stopping by Crafty hugs xx 

Wednesday 30 August 2017

Little Lilies and Leaves stamp set and die from Honey Doo Crafts

Hello everyone xxx

Back again with another DT sample for
Honey Doo Crafts

I used the beautiful :
Little Lilies and Leaves stamp and Die
Birthday Sentiments

Also used :
Versmark ink
Gold embossing powder
Distress Oxides : Worn Lipstick, Cracked Pistachio
Smokey Grey versafine ink
Clear gems


  • Cut some white card slightly smaller than card blank 
  • Using gold embossing powder,  stamp and heat emboss the flowers and leaves around the edges of the card 
  • Stamp,  heat emboss and cut out a few flowers, using the Die, on a seperate piece of white card 
  • Ink around the edge of the card with the Worn Lipstick Distress ink,  blending from dark on the outside, to lighter towards the centre
  • Add a hint of the Cracked Pistachio to the leaves
  • Adhere card to card blank 
  • Using cut out flowers as a guide, stamp a few swirls,  in the Smokey Grey versafine ink,  so they will peek out from behind the 3 d flowers
  • Stamp the sentiment in Versafine 
  • Shape and adhered the 3d flowers to the card blank using 3d glue gel 
  • To finish add a few clear gems 
Thankyou very much for stopping by to take a look.
I hope you like my sample today and please feel free to leave a comment.  I love reading them all 

Crafty hugs xx 

Tuesday 29 August 2017

Ornate Watercolour Frame die from Stamps By Me

Hello everyone
Hope you're well and have had a good day.

I'm back with another DT sample using the beautiful Ornate Watercolour Frame die and Thankful For stamp set, available from
Stamps By Me 
I've done another over the page style card, my new favourite design lol

Also used :
Black onyx versafine
Moonlight White Dew Drop ink pad
White gel pen


  • Cut your Ornate frame out of white card and stamp the gorgeous Flowers in black onyx versafine. Set to one side 
  • Stamp them again, directly onto your card blank, coming down from the top. Lay the card blank open flat, ensuring you go over onto the back cover of your card blank. Stamp using first and second generation stamping ie don't re-ink in between each stamp. This creates the effect of dimension 
  • Adhere the ornate frame using foam pads 
  • Stamp the sentiment onto a small die and mount with a foam pad to complete your card
I hope you like today's sample..it looks so elegant in monochrome 

Crafty hugs xx 

Colour To The World by Stamps By Me

Hello everyone

I'm back again lol

Here's another sample showcasing the gorgeous new Colour To The World stamp set by Stamps By Me 

Also used:
Distress Oxides : Wilted Violet, Worn Lipstick, Picked Raspberry
Smokey Grey versafine
Clear gems


  • Cut some white card slightly narrower than your 8x6 card blank, so it leaves a thin border on each side
  • Stamp the outline stamp in smokey grey versafine ink,  masking off each flower to enable you to overlap each one. Also use second generation stamping  ie don't re ink know between stamping image
  • Ink up the solid stamp in various combination if the distress inks, spritzing with water before stamping.  Dry off before covering with mask to stamp the next one etc
  • Stamp sentiment 
  • Add clear gems 
  • Assemble card with wet glue
Hope you like this sample.  Thankyou for stopping by 
Crafty hugs xx 

Follow Your Dreams by Stamps By Me

Hello everyone xx

How are we all?

Today I'm sharing my first DT sample using the gorgeous new Follow Your Dreams stamp set by Stamps By Me  which is being showcased on c&c on 2nd September

Also used :
Pixie Powders
Kuretake clean colour pens
Olympia Green versafine
Habanero versafine
(Tim Holtz die from my crafty stash )


  • Cut decreasing squares in orange and white card, to create your mats and layers
  • On the smaller white card use the die to create a background effect
  • On a seperate piece of card create a background using Pixie powders.  Adhere this to the back of the white square so it shows through your die cut
  • Ink up the flower in the Olympia Green and Habanero versafine and stamp on the right side of the card
  • Use the kuretake clean colour pens to colour it in
  • Stamp the sentiment in black onyx versafine 
  • Assemble all your layers and adhere to card blank 
I hope you like today's use of these gorgeous stamps 

Crafty hugs xx 

Monday 28 August 2017

Much Loved Friends by Stamps By Me

Hello everyone  xx

How are we all? Enjoying the sunshine I hope xx

This afternoon's blog showcases another new stamp from Stamps By Me 

This is the beautiful Much Loved Friends. Stunning silhouette flowers and leaves with heartfelt sentiments

Also used:
Distress Inks : Squeezed Lemonade, Worn Lipstick, Spiced Marmalade
Distress Oxides : Peeled Paint
Olympia Green versafine
Clear gems
Green paper


  • Cut a panel of green paper and slightly smaller panel of white card.  Set green panel to one side 
  • Stamp the first rose in Worn Lipstick DI, at the bottom but in the centre of your panel. Mask this off then stamp one in Squeezed Lemonade and one in Spiced Marmalade,  on either side of the first rose, ensuring you overlap them slightly 
  • Mask these flowers too then stamp remaining roses
  • Mask off these then stamp all your leaves in the Peeled Paint DO 
  • Remove all the masks 
  • Stamp the sentiment in the Peeled Paint in the top left of the panel
  • Glue this to the green paper panel
  • Adhere across your card blank 
  • Stamp other sentiment,  in the Peeled Paint,  under the panel on the right of the card blank
  • Add a few clear gems to complete  
I hope you liked the way I used these stamps in today's sample 

Thankyou for taking the time to look 
Crafty hugs xx 

Altenew Watercolor Frames

Good morning everyone
Hope you're well and having a lovely Bank Holiday weekend xx

Today I'm back with my Monday morning blog for Bumbleberry Papercrafts 

I'm using the absolutely beautiful,  and very versatile Watercolour Frames by Altenew. I also used the sentiment from the
Halftone Circles set also by Altenew

Also used:
Distress Oxides:  Fossilized Amber, Peeled Paint
Black onyx versafine


  • Ink up the splattered circle frame in the two Distress Oxides and stamp in the bottom right corner of your card blank 
  • Stamp it again on a masking sheet (or sticky post it note), cut out and mask off your stamped image
  • Stamp the other circle frame in the Peeled Paint and stamp slightly overlapping first image
  • Repeat this several times, also in the Fossilized Amber 
  • Remove mask
  • Stamp the sentiment in black onyx versafine to complete
Such an easy and quick card but very effective. Colours and sentiment can be changed appropriately to suit other recipients and occassions

Many thanks for popping by and I'll be back next Monday with another Bumbleberry Papercrafts product

Crafty hugs xx 

Sunday 27 August 2017

Get your happy on by Stamps By Me

Hello everyone xx

Hope you are all enjoying the sunshine..such a beautiful day.

 I'm showcasing another new stamp set by
Stamps By Me

This sample was made using:
Get your happy on  

Also used:
Distress Oxides : Cracked Pistachio, Fossilized Amber, Twisted Citron, Peacock Feathers
Masking tape


  • Mask a panel across your card blank, using masking tape 
  • Stamp the ink splats randomly above and below the masking tape, in the various Distress Oxides.  Ensure some overlap onto the tape
  • Remove the masking tape carefully 
  • Stamp the sentiment within the panel, in the Fossilized Amber DO 
A quick and simple CAS card, but can be changed just by using different colour combos

Many thanks for popping by 
Crafty hugs xx 

Dies and stamps by Stamps By Me

Hey everyone
How are we all?
Today I'd like to share a sample I made using the following stamps and dies from
Stamps By Me 

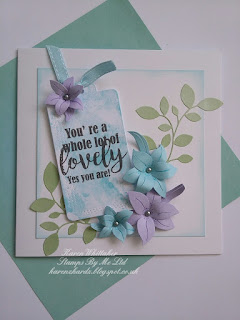
Detailed Flourish 1 die
Build A Flower 2 die
With Love tag die
Get Your happy On stamp

Also used :
Distress Ink: Tumbled Glass
Smokey Grey versafine
Papers in blue, Lilac and green
Kuretake clean colour pens


  • Cut a square of white card smaller than card blank 
  • Ink round edges with Tumbled Glass DI and adhere to card blank
  • Cut out tag and create a watercolour background by putting some Tumbled Glass DI on a glass mat, spritz with water and drag tag through it. Dry off with heat gun
  • Stamp sentiment with Smokey Grey versafine and attach some blue ribbon on it before adhering onto card blank with foam pads
  • Cut the flowers out from pink and lilac papers. Shade a few lines and dots with your pens then shape and assemble into 3d flowers 
  • Cut the flourish out on green paper 
  • Adhere the flowers and flourish using pinflair glue gel 
  • Finish off by adding pearls to centre of flowers 
Thankyou for stopping by and hope you like today's sample 

Crafty hugs xx

Saturday 26 August 2017

Life is Precious and Poppy die from Stamps By Me

Hi everyone  xx

I'm back again with another DT sample using the gorgeous new Poppy 1 die from
Stamps By Me 
I also used the beautiful  Life is Precious stamp set

Also used:
Pixie Powders
Distress Oxide: Cracked Pistachio, Peacock Feathers


  • Cut a panel of white card and a slightly bigger panel of black.  Set the black card aside 
  • Create a background using Pixie powders.  Adhere this to black card once dry and then adhere to right hand side of card blank
  • Using Peacock Feathers and Cracked Pistachio DO,  stamp the sentiment down the left hand side of the card blank.  Ensure the Peacock Feathers one is the only complete one..the rest are stamped off the edge of the card blank 
  • Cut out poppy die in white. Keep the left over catd as you will need to use this as a stencil. Keep all the pieces in the poppy and adhere over background panel 
  • Using the left over card as a stencil, ink through the small poppy in Cracked Pistachio DO to complete
Many thanks for popping by and please check out the website for lots more fabulous products 

Crafty hugs xx 

Poppy die and Life is Precious stamps by Stamps By Me

Hello xx

How is everyone?

Today's post is a sample using the new
Poppy 1 die and Life is Precious available from Stamps By Me 

Also used:
Rainbow mirri
Distress Oxides : Cracked Pistachio, Peeled Paint
Olympia Green versafine
Stencils: clock face, harlequin


  • Cut a square of rainbow mirri and a slightly smaller square of white card.  Set mirri to one side 
  • Blend the Cracked Pistachio DI through the clock stencil onto the white card. Whilst keeping it in place, blend Peeled Paint DO randomly through the harlequin stencil. Remove clock stencil
  • Cut out poppy die in white. Pop out all the bits then adhere to background 
  • Die cut out the flower areas of the poppy on some red card and the leaves on some green card
  • Pop out all the bits then use wet glue to pop the red and green pieces back into the white poppy
  • Stamp the sentiment in the Olympia Green versafine 
  • Assemble card
I hope you've enjoyed today's post. Please check out their website for these and more beautiful products 

Crafty hugs xx 

Friday 25 August 2017

Butterfly And Flowers Large Corner from Honey Doo Crafts

Afternoon  everyone xx
How are you all? Anything exciting planned for rest of today?

Here's a DT sample I made for
Honey Doo Crafts to showcase the beautiful

Butterfly And Flowers Large Corner
Birthday Sentiments
Music Notes

Also used :
Distress Oxide: Worn Lipstick
Kuretake clean colour pen : Green Shadow
Smokey Grey versafine ink


  • I cut some green card slightly smaller than my card blank and white card slightly smaller than this 
  • The Butterfly Corner was stamped onto the white card with the Smokey Grey versafine ink.  I also stamped part of it coming down from the top right corner 
  • The sentiment and a butterfly were also stamped in the Versafine 
  • On a seperate piece of card I stamped it again,  coloured in the flowers with the Green Shadow pen, then cut them out. 
  • Using the Worn Lipstick Distress Oxide, I stamped the Music Notes, so it went over the flowers
  • The sample was then assembled and the flowers shaped and adhered with 3d glue gel 
I hope you enjoyed reading through today's blog 

Many thanks 

Crafty hugs xx 

Thursday 24 August 2017

Birds On A Wire and BEAUtanicals Wildflower 2 by Bee Crafty

Hello everyone x

It's me back with my weekly DT blog for
Bee Crafty over on their blog
Buzzy Goings On At Bee Crafty Blog


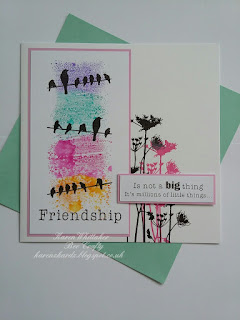
Today I'm sharing a card I made using the following stamps
Birds On A Wire 
BEAUtanicals Wildflower 2
Friendship

Also used :
Distress Oxides   : Picked Raspberry
Distress Inks  : Picked Raspberry, Spiced Marmalade, Cracked Pistachio, Wilted Violet
Black onyx versafine ink


  •  I cut a panel of pink card and a slightly smaller panel of white card, that would mat vertically down the side of my 8x8 card blank 
  • Using masking tape I masked of a smaller panel on the white card
  • I inked up an acrylic block with the 4 distress inks and spritzed with water then I stamped over the masked panel
  • Keeping the masking tape on, I stamped the Birds On A Wire in black onyx versafine ink 
  • I removed the tape and stamped the Friendship part of the stamp across the bottom.  I adhered this to the pink card panel
  • Using this panel as I guide I stamped the flowers onto the card blank, in the Picked Raspberry Distress Oxide and the Black onyx versafine ink,  so they looked like they were tucked under the panel, which I then adhered to the card blank with wet glue
  • The remainder of the Friendship stamp was stamped in black onyx versafine ink onto a piece of card, cut down and matted onto some of the pink card 
  • This was adhered with foam pads to complete this sample 
I hope you like this week's sample showcasing these beautiful products. 

Thankyou for stopping by 
Crafty hugs xx 

Wednesday 23 August 2017

Life is Precious and Rose die from Stamps By Me

Hello there xx

It's me again lol. Back with another DT sample for Stamps By Me 

Today I'm showcasing
Detailed Flower 1 die
Life is Precious stamp

Also used:
Circle die from my stash
Green and yellow paper
Distress Ink: Squeezed Lemonade
Olympia Green versafine


  • Cut out the rose using both dies from the set
  • Use the outline die to cut out a flower head on yellow paper and cut some green paper to place behind the leaf. Assemble the rose 
  • Using the rose as a guide, cut out a circle from the front of your card blank,  to create an aperture 
  • Stamp the sentiment in the Olympia Green versafine so it sits on the inside of the card blank, within the aperture 
  • Stamp the other sentiment in the top right of the card front
  • Adhere rose in place so it sits just over the aperture 
  • Ink the edges of your card blank in Squeezed Lemonade DI to complete
Many thanks for popping by 
Crafty hugs xx 

Life is too short to drink cheap wine...

Hello everyone

Hope you're all well and have a lovely day ahead of you xx

So did that title draw you in... don't mind if I do partake..lol

And on that note, here's one of my samples for the new
Life is to short to drink cheap wine

Available from www.stampsbyme.co.uk

Also used :
Distress Oxide: Iced Spruce
Distress Ink : Worn Lipstick
Red versafine ink
Smokey Grey versafine
Stencils
Circles stamp


  • I stamped the bottle and glass in smokey grey versafine directly onto my card blank. I used red versafine to stamp the contents of the bottle and glass! This was then masked off
  • I blended Worn Lipstick DI through a dotty stencil and Iced Spruce through a chevron stencil
  • The circles stamp were randomly stamped in the Iced Spruce DO 
  • I removed the mask
  • To complete I stamped the sentiment in the red versafine 
A simple CAS card for that "merry" occasion 

Many thanks for popping by 
Crafty hugs xx 

Tuesday 22 August 2017

Flower Veins stamp and Die by Honey Doo Crafts

Good morning everyone xx

How's your day looking. .anything planned?

For this blog I'm sharing  sample I made showcasing the following :
Flower Veins stamp and die
Birthday Sentiments

Also used:
Embossing Powders :
Sapphire Blue Pearl 
Kuretake clean colour pens
Distress ink : Chipped Sapphire
Distress Oxide: Cracked Pistachio
Heat resistant acetate
Pearls


  • Cut white card slightly smaller than card blank 
  • Stamp the largest flower, and swirls, several times, in the Sapphire Blue Pearl embossing powder,  on heat resistant acetate
  • Stamp and heat emboss the largest flower and smaller flower, on white card  
  • Stamp and heat emboss the leaves on white card and colour in with Kuretake clean colour pens 
  • These were then cut out using the die,  shaped and assembled to create 3 3d flowers. 
  • Using these as a rough guide, stamp more flowers,  in the Chipped Sapphire DI, on the white card, so they will sit behind the 3d flowers. Also stamp a couple coming down from the top of the white card. Leaves and swirls are stamped in the Cracked Pistachio. 
  • Glue the card onto the card blank then glue the 3d flowers, swirls and leaves with 3d glue gel
  •  Stamp the sentiment and butterflies in the Cracked Pistachio and add a few pearls to finish 
I hope you have enjoyed looking through today's blog

Crafty hugs xx 

Monday 21 August 2017

Life Is Precious mdf plaque

Hello everyone  xx

This evening's post is showcasing the gorgeous
Life Is Precious stamp set by Stamps By Me  

This is one of their colouring in stamp sets but for the purposes of this sample I wanted to leave it uncoloured

Also used:
White gesso
Pale grey acrylic paint
Moonstone Lustre Luxe
Silver Gilding wax
Black onyx versafine
Ribbon
Squares stamp from my stash


Cover the mdf in white gesso and once dry paint over with pale grey acrylic paint
Once dry drag some Moonstone Lustre Luxe from the edges, randomly,  to add a hint of shimmer
Apply silver gilding wax around the edges of the mdf and again drag some down to add hint of shine
Stamp all the images in black onyx versafine ink
Attach ribbon to complete

Simple but a beautiful gift for anyone

Thankyou for stopping by
Crafty hugs xx

Life Is Precious by Stamps By Me

Hello everyone

Hope you're all ok today xx

I'm showcasing another new stamp from Stamps By Me 
This is the beautiful colouring stamp set
Life Is Precious

Also used :
Distress Inks : Weathered Wood, Chipped Sapphire,  Peacock Feathers, Tumbled Glass, Salty Ocean
Distress Oxides : Iced Spruce,  Peacock Feathers
Lustre Luxe : Moonstone
Silver Embossing powder
Versmark Ink
Rainbow Mirri
Moon stamp


  • Cut decreasing squares of rainbow mirri and white card. Set all to one a side except for the smallest white square 
  • Stamp the Moon in Iced Spruce DO then rub some Moonstone Lustre Luxe over it with your finger
  • Mask off Moon then blend the blue Distress Oxides, from light to dark, the further away from the stamped moon you get, to create your background 
  • Remove mask
  • Stamp the flower stamp in Versmark then heat emboss in silver embossing powder 
  • Stamp and heat emboss the sentiment in the silver
  • Colour in the flower heads with Chipped Sapphire and Peacock Feathers DI and a water brush 
  • Assemble card using wet glue
Hope you like today's sample 

Thankyou for stopping by 
Crafty hugs xx 

Happy Cake Day from Bumbleberry Papercrafts

Good morning everyone xx

Hope you all had a lovely weekend xx

I'm back with my usual Monday morning blog for Bumbleberry Papercrafts and today I've got a card I made using the adorable
Happy Cake Day by MFT
I combined it with the beautiful
Doodled Blooms also by MFT

Also used:
Distress Oxides : Fossilized Amber
Kuretake clean colour pens
Patterned papers
Oval stencil
Masking Tape
Black onyx versafine


  • Place an oval stencil on card blank
  • Tape masking tape across the aperture then blend with Fossilized Amber DO 
  • Carefully remove tape to reveal your background
  • Stamp your image on white card then onto the two patterned papers
  • Cut out the cake from one of the stamped papers and her dress from the other
  • Cut out your girl from the white card then adhere the patterned dress and cake, with wet glue
  • Colour in the rest of her with your pens
  • Adhere with wet glue onto the card
  • Stamp the Doodled Blooms in black onyx versafine and colour in with your pens
  • Finish off by stamping the sentiment in the black ink
I hope you like this week's blog and I'll be back again next Monday with another for you 

Crafty hugs xx 

Sunday 20 August 2017

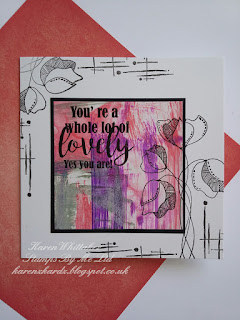
You're a whole lot of lovely....

Hello again everyone  xx

Had some play time in the craft room and made its card using some stamps from
Stamps By Me 

Get Your Happy On 
Life Is Precious 

Also used :
Glossy paper
Distress Oxides : Iced Spruce, Worn Lipstick, Wilted Violet
Black onyx versafine
Retro Dots and Dash  stamp by Bee Crafty


  • I cut a square of black card and a slightly smaller square of glossy paper
  • I put the Distress Oxides on a glass mat and dragged the glossy paper across it. I dried each time in between adding more colour
  • I adhered the background with temporary adhesive then stamped my flowers,  in black onyx versafine,  so they partly stamped over the background.  I also stamped the sentiment in the black versafine 
  • I carefully removed the background,  adhered it to the black card mat then adhered it to card blank, ensuring my lines all matched up
  • I stamped a few of the flowers coming down from the top of the card blank, and some random dots and dashes 
I hope you enjoyed today's blog 

Crafty hugs xx 

Flower dies from Stamps By Me

Hello 😊

How are you all?

Today I'm sharing a DT sample showcasing the new flower dies from
Stamps By Me 

Detailed Flower 1 die
Build a Flower 1 die
Detailed Flourish 1 die
With Love die

Also used :
Monochrome papers
Green paper
Oval die from my stash


  • Create a diagonal easel card, by scoring the front of your card blank diagonally, from corner to corner then fold forward 
  • Matt papers on the inside of the card blank. Cut some of the paper to fit the top triangle of the card blank, that folds forward 
  • Cut 2 ovals from white card
  • Cut the rose die out of one of the ovals. On the reverse of the cut out out oval adhere some monochromatic paper where the flower head goes and some green paper where the leaves are. Adhere the cut out rose back into the oval.
  • Adhere the second oval die cut on the reverse of the first, to cover all the "workings"
  • Adhere this to the fold over section of the card front only
  • From some of the papers cut out the Build A flowers and create a 3d flower.  Cut out the Flourish from some green paper
  • Work out where you wish to adhere your 3d flower as this will be your "stopper", to stop the card from closing when it's stood up. Adhere the flourishes as appropriate 
I hope you enjoyed today's post and thankyou for popping by 
Crafty hugs xx 

Saturday 19 August 2017

Floral Corner Flourish with pearl embossing powders from Honey Doo Crafts

Hello everyone xx

Today I'm sharing a DT sample using the beautiful
Floral Corner Flourish 
Birthday Sentiments 
Script
Available from Honey Doo Crafts 

Also used:
Pearl embossing powders: Green Tourmaline,
Sapphire Blue


  • Cut a square of black card slightly smaller than card blank
  • Stamp the Floral Corner in Versmark and heat emboss in the Sapphire Blue 
  • Stamp and heat emboss the script in Green Tourmaline 
  • Stamp and heat emboss the sentiment in the blue embossing powder 
  • Adhere this to card blank
  • Draw a black wiggly line to frame your card
How easy was that but soo effective don't you think. Many thanks for popping by 
Crafty hugs xx 

Friday 18 August 2017

Get your happy on by Stamps By Me

Good morning crafters

Hope everyone is well xx

Today I'm showcasing one of the new stamp sets from Stamps By Me

This is the beautiful sentiment and Splats set
Get your happy on  

Also used:
Distress Oxides : Wilted Violet, Picked Raspberry,  Peacock Feathers
Black fine line pen
Black onyx versafine


  • Cut a square of black card and a slightly smaller square of white card.  Set black mat to one side 
  • Stamp the ink splats in the various Distress Oxides 
  • Draw "stems" with a fine line pen 
  • Stamp the fabulous sentiment,  across the stems, in black onyx versafine 
  • Shere this to black mat and then onto card blank
  • Frame this by drawing wiggly lines around it with a black pen
A fun and different way to use the ink splats from this set

Thankyou for stopping by 
Crafty hugs xx 

With Love and Flowers by Stamps By Me

Hello everyone xx

I'm back again today with a sample to showcase the beautiful new
With Love and Flowers  stamp set from
Stamps By Me 

Also used:
Moon stamp
Distress Inks : Squeezed Lemonade, Cracked Pistachio, Spiced Marmalade, Fired Brick
Distress Oxide: Fossilized Amber
Kuretake clean colour pen : light green
Smokey Grey versafine
Black onyx versafine
Hill stencil


  • In decreasing sizes I cut a square of orange paper and 2 squares of white card. I set the orage paper and largest square to one side
  • I put a strip of masking tape across the card and stamped the Moon in Spiced Marmalade and Squeezed Lemonade DI, so only half the moon would be visible 
  • I masked off the Moon too and blended more of the DI to create the sky
  • I removed the masking tape and moved it across where the skyline began, then used the Cracked Pistachio DI and a "hill" stencil to create the hills
  • I removed the masking tape and dried off the background with a quick blast of my heat gun
  • The outline stamp was inked up in Smokey Grey versafine and stamped across the card at various heights to give the effect of dimension
  • The solid stamp was inked up with Fired Brick DI and a green Kuretake clean colour pen, for the leaves. This was stamped over the outline images
  • The sentiment was stamped in black onyx versafine 
  • I assembled the card using wet glue 
I hope you enjoyed looking through today's post 

Crafty hugs xx 

Thursday 17 August 2017

Ladies Profile, Moon and BEAUtanicals stamp sets by Bee Crafty

Good morning lovely crafters xx

Hope everyone is feeling good

I'm back today with my weekly blog post for Bee Crafty  over on their blog
Buzzy Goings On At Bee Crafty Blog 

I'm showcasing the following beautiful stamps sets:
Ladies Profile
Moon
BEAUtanicals Wildflower 2
BEAUtanicals Ground Elder 
Life and Rain 

Also used:
Distress Inks  : Salty Ocean, Tumbled Glass, Squeezed Lemonade
Black onyx versafine ink
Smokey Grey versafine ink


  • Cut a square of blue paper and two squares of white card, in decreasing sizes, smaller than the 7x7 card blank 
  • Taking the smallest square of white card I stamped the Ladies Profile, and the Moon, in Smokey Grey versafine ink 
  • The Wildflower 2 was stamped in the Squeezed Lemonade DI, ensuring they were stamped at different heights
  • I then stamped the Ground Elder in the Tumbled Glass and Salty Ocean DI'S.  I also stamped some a second time, without reinking.  This gives depth and dimension to your flowers
  • The LIFE part of the sentiment stamp was stamped in black onyx versafine ink 
  • I then adhered all the layers together with wet glue and then adhered it to card blank
I love the effect of these beautiful stamps together..I hope you do too.
Don't forget to check out the Bee Crafty website for these stamps and many more 

Crafty hugs xx  

Wednesday 16 August 2017

Bee Flourish and Bee Whatever You Want To Bee stamp sets by Honey Doo Crafts

Afternoon  ðŸ˜ŠðŸ˜Š

Following on from this mornings post, here's another sample I made using the same stamps,

Bee Flourish
Bee Whatever You Want To Bee 
Stamp sets from Www.honeydoocrafts.co.uk 

Also used :
Distress Oxides : Twisted Citron, Worn Lipstick, Iced Spruce
Black onyx versafine ink
Honeycomb stencil from my stash


  • To begin I cut a square of black card and a slightly smaller square of white card. I set the black mat to one side
  • Using the Iced Spruce I inked through my honeycomb stencil 
  • I randomly stamped the Bee Flourish in both Distress Oxides, overlapping them to create depth and dimension 
  • I also stamped part of the flourish in the Twisted Citron, around the top edge of the white card 
  • The sentiment and a few random bees were stamped in black onyx versafine ink 
  • I then assembled the card using wet glue
I hope you like this sample and many thanks for popping by for a look 

Crafty hugs xx 

Bee Flourish and Bee Whatever You Want To Bee stamp sets by Honey Doo Crafts

Morning xx

Hope you're all well and have a lovely day planned

Here's a sample I made using
Bee Flourish
Bee Whatever You Want To Bee 
From Honey Doo Crafts

Also used :
Distress Inks : Spun Sugar, Cracked Pistachio
Kuretake clean colour pen: Green Shadow
Smokey Grey versafine ink
Honeycomb stencil from my stash


  • I masked off a panel on my hammered DL card blank 
  • Using the Distress inks I blended them through my honeycomb stencil
  • The Bee Flourish was stamped in the Smokey Grey versafine ink 
  • The masking tape was then removed and I stamped the sentiment in the versafine ink,  slightly over the edge of the panel
  • A few bees were also stamped randomly in the versafine ink 
  • To complete I drew a wiggly line around the panel in my Kuretake clean colour pen 
Thankyou for stopping by 
Crafty hugs xx 

Tuesday 15 August 2017

Much Loved Friends stamp and flower dies by Stamps By Me

Hello 😊😊

Hope everyone is good xx

I'm sharing a DT sample I made to showcase the new stamps and dies from
Stamps By Me 

Much Loved Friends stamp
Build a Flower 1 die

Also used:
Distress Oxides : Wilted Violet, Worn Lipstick, Cracked Pistachio
Honeycomb stencil


  • Use masking tape to mask off a square on your card blank 
  • Blend Wilted Violet DO,  graduating from dark to light, towards the centre
  • Blend through the stencil randomly, with Worn Lipstick DO
  • Remove masking tape 
  • Cut out the flowers on copier paper and ink around the edges of the petals with the Worn Lipstick and Wilted Violet DO 
  • Curl petals then assemble to create 3d flowers 
  • Cut out the leaves and stems and colour with Cracked Pistachio DO 
  • Adhere the flowers and leaves with 3d glue gel and the stems with wet glue, ensuring the stems stay within the square panel
  • Stamp the sentiment in Wilted Violet DO to complete 
Many thanks for popping by 
Crafty hugs xx 

With Love and Flowers by Stamps By Me

Good morning everyone xx

Today I'm very excited to share my first DT sample for the new stamps being showcased tonight live on Facebook at 8pm by Toni from Stamps By Me . For this sample I used

 With Love and Flowers  and
 the fabulous big font stamp set
Happy Thoughts. I love big fonts on my cards and the sentiments on here fit so many different occasions

These stamps and many more new products will be released on c&c on the 21st August

Also used:
Masking tape
Distress Oxides : Peacock Feathers, Wilted Violet, Picked Raspberry
Black onyx versafine
Stencils: Chain link, harlequin


  • Use masking tape to mask off 3 panels
  • Blend the Distress Oxides within the panels, spritzing with water in between each layer 
  • Add some effect by inking through the stencils in the same colour Distress Inks 
  • Remove masking tape 
  • Stamp the outline flower stamp in black onyx versafine 
  • Ink up the solid flower stamp in Wilted Violet and Peacock Feathers DO and stamp over the outline image 
  • Stamp the sentiment stamps in black onyx versafine 
  • Add clear gems to complete
I hope you enjoyed today's post and the sample made with these stamps 

Thankyou for stopping by 
Crafty hugs xx 

Monday 14 August 2017

Fierce Friends from Bumbleberry Papercrafts

Good morning crafters

Hope you all had a wonderful weekend.

I'm back today with my usual Monday morning blog for Bumbleberry Papercrafts

For this sample I used the absolutely adorable
Fierce Friends  by MFT.  How cute are these characters and the sentiments make it a versatile stamp set for many occasions

Also used :
Distress Inks: Cracked Pistachio, Tumbled Glass, Salty Ocean
Smokey Grey versafine
Dots stencil


  • Cut a square of blue card and a slightly smaller square of white card.  Set the blue card mat to one side
  • Stamp the first character in the smokey grey versafine. Mask it off before stamping the next character. Mask this one off and stamp the third. This technique makes them appear to sit behind each other. Mask off the third stamped image
  • Blend the Distress inks over the masked images, to create a background 
  • Stamp the tree in the Cracked Pistachio and the Roar stamp in Salty Ocean
  • Blend the Tumbled Glass DI through the dotty stencil 
  • Remove the 3 masks
  • On a seperate piece of white card stamp the sentiment in the Salty Ocean and mat on a piece of blue card
  • Assemble your card using wet glue 
I hope you like today's sample. Check out the website for this, and many more gorgeous stamps and products 

Crafty hugs xx 

Saturday 12 August 2017

With Love die and True Friends stamp by Stamps By Me

Good morning everyone

Another weekend is upon us. What do you have planned?

Today's blog showcases the beautiful dies and stamps from Stamps By Me

These samples use the following :
True Friends
With Love die

Also used:
Distress Oxides : Wilted Violet, Cracked Pistachio, Worn Lipstick
Distress ink : Squeezed Lemonade


  • Cut a mat of black card slightly smaller than your card blank and a mat of white card slightly smaller than this 
  • Set the black mat to one side 
  • Place some masking tape across where the stem of your stamped flower will be (wide enough for the sentiment die to fit in to)
  • Ink up the solid stamp with the DO and stamp so the image goes across the masking tape
  • Stamp the image again coming down from the top left of the card
  • Remove masking tape and adhere to black card mat and then onto card blank 
  • Cut the With Love die on black card and adhere the sentiment across the flower stem, in the masked off panel 


  • For this sample I cut a square of black card and slightly smaller square of white card 
  • I stamped a moon stamp I have, in black onyx versafine ink then masked it off.
  • I used Worn Lipstick and Squeezed Lemonade to blend a background
  • Using black onyx versafine I stamped the solid True Friends stamp,  just off the edge of the card
  • The Amazing sentiment was also stamped in black versafine. Using a paint brush, I created moonlight rays by drawing lines with the brush dipped in water, then blotting the ink off with a paper towel.  I repeated this technique until I was happy with the density of the rays
  • I adhered this to the black card and then onto the card blank with wet glue
  • To complete I added a few clear gems 


Very simple but beautiful designs using these beautiful products. 

Thankyou for stopping by and hope to see you back here soon

Crafty hugs xx 

Friday 11 August 2017

Butterfly and Flowers Large Corner by Honey Doo Crafts

Afternoon crafters   xx
Hope you're all well. Been up to much today?
I had my beautiful granddaughter as usual, lots of fun and games to be had lol

Thought I'd share a DT card I made to showcase the following stamp sets by Honey Doo Crafts 

Butterfly And Flowers Large Corner
Birthday Sentiments

Also used :
Distress Inks : Spiced Marmalade, Chipped Sapphire
Kuretake clean colour pens
Black onyx versafine ink


  • I cut some white card, which would create a panel to the left of my card blank
  • I put some of the Distress inks onto a glass mat, spritzed with water and then pushed the card panel into it. I dabbed areas that I wanted to infill,  until I was happy with my background 
  • The Butterfly Corner, sentiment and butterfly,  were stamped in black onyx versafine ink 
  • I added a hint of colour to the Butterfly wings, with my kuretake clean colour pens 
  • I used the panel as a guide then stamped part of the Butterfly Corner directly on to the card blank, so it would peek out from under the stamped panel, once it was adhered. 
  • I also stamped the sentiment and Butterfly onto the card blank before adhering my stamped panel with wet glue
I hope you enjoyed today's blog post 

Crafty hugs xx 

Thursday 10 August 2017

Moon and Fables and Fantasy Delight stamp sets by Bee Crafty

Good morning crafters
How are we all this week?

I'm back with my weekly DT post for
Bee Crafty

This week I'd like to share a card I made using the following stamp sets:
Moon
Fables and Fantasy Delight  
Life and Rain

Also used:
Distress Inks  : Broken China, Tumbled Glass, Chipped Sapphire
Black onyx versafine ink
Rainbow Mirri


  • I began this card by cutting a square of rainbow mirri slightly smaller than my 6x6 card blank and a square of white card slightly smaller than this
  • I stamped the Moon in black onyx versafine ink and masked it off 
  • I blended the DI'S over the white card, the lightest blend being closest to the moon stamp, getting darker the further away I blended
  • Using a water brush I created moonlight rays, dabbing each ray with a paper towel,  to bleach the ink out
  • Delight was stamped in black onyx versafine ink,  as was the sentiment 
  • To complete I adhered this to the mirri and then to the card blank
I was really happy with how this sample turned out lol. I hope you like it to. Don't forget to check out their website for lots of beautiful products and offers

Thankyou for stopping by

Crafty hugs xx 

Wednesday 9 August 2017

Friendship and Moon stamp sets by Bee Crafty

Good morning crafters

Where has the time flown. Half way through the summer holidays already!!

Today I thought I'd share a card I made, not a DT sample this time lol

I love the Moon stamp! So versatile and can be combined with any stamps. I wanted a simple CAS card so here's what I made

Moon stamp
Friendship stamp

Also used:
Leaf stamp from my stash
Distress Oxide: Iced Spruce
Distress Ink: Broken China,  Tumbled Glass
Smokey Grey versafine ink
Black onyx versafine ink


  • Cut a square of black card and a square of white card slightly smaller than card blank. Set black mat to one side 
  • Mask off a horizontal panel 
  • Stamp the Moon in Iced Spruce DO. 
  • Leaving mask on blend the Distress inks in the panel
  • I used a damp piece of kitchen towel to blot off some ink, to create a cloudy effect
  • The leaves were stamped off the edge in Smokey Grey versafine 
  • Remove the masking tape
  • Stamp the Friendship stamp in black onyx versafine so part of it goes across the inked panel
  • Assemble card using wet glue
I hope you like this quick CAS card , which if used in different colours ways, can be for male or female 

Crafty hugs xx 

Tuesday 8 August 2017

Flower Veins stamp and die from Honey Doo Crafts

Good morning xx

Today's post is showcasing the beautiful
Flower Veins stamp and die
Friendship Quotes
From Honey Doo Crafts 

Also used:
Embossing Powders:
Green Tourmaline Pearl 
Red Garnet Pearl 
Black onyx versafine ink
Clear gems
Black Stickles


  • I cut 4 strips of white card slightly shorter than the width of my card blank. These were adhered with wet glue
  • I stamped and heat embossed the flowers, swirls and leaves, on black card, in the Pearl embossing powders 
  • The dies were used to cut them all out
  • These were then shaped and assembled to create 3d flowers 
  • I placed them roughly where I wanted them to go, so I could stamp the Friendship part of the sentiment stamp in the correct place
  • The flowers, swirls and leaves were adhered into place using pinflair 3d glue gel and a few clear gems were added, to complete this sample 
Thanks for looking and I hope you enjoyed today's blog

Crafty hugs xx 

Monday 7 August 2017

Happy Cake Day from Bumbleberry Papercrafts, by MFT

Hello crafters xx

Monday is here again..how fast did that weekend go!

I'm back with my Monday morning blog for
Bumbleberry Papercrafts  and today I'm sharing a card I made using the adorable
Happy Cake Day

Also used:
Distress Oxides: Fossilized Amber, Wilted Violet, Cracked Pistachio
Smokey Grey versafine ink
Striped Purple  Paper
Plain Yellow Paper
Kuretake clean colour pens


  • Using masking tape, I masked off a square panel on my card blank 
  • The Distress Oxides were blended together, spritzing with water, to create a background 
  • The masking tape was removed and the sentiment was stamped,  in Smokey Grey versafine, around the square panel
  • I stamped the girl 3 times. Once on white card,  once on yellow paper and once on the purple striped paper.  
  • The image on the white card was cut out, and her face , hair, arms and legs were coloured in with Kuretake clean colour pens 
  • From the purple striped image, I cut the sections of her dress out. On the yellow paper I cut out the cake
  • Using wet glue I adhered the pieces of the dress and cake to my coloured in image. This is called paper piecing 
  • She was adhered to card blank using foam pads, to complete this sample 
I hope you've enjoyed today's post and don't forget to check out their website for more amazing products 

Crafty hugs xx 

Saturday 5 August 2017

All Things Grow With Love from Stamps By Me

Good morning

The weekend is here again..where did that week go! Second week of my summer holidays already over... slow down please!

Anyways, today I'm showcasing a sample I made using the following products from
Stamps By Me 

All Things Grow With Love stamp
Loving Wishes tag die
With Love die

Also used:
Kuretake clean colour pens
Black onyx versafine ink
Smokey Grey versafine ink


  • To begin I used the two dies from the Loving Wishes die set, to create a white tag frame. 
  • I placed it roughly where I wanted it to go then marked the inside frame on my card blank. This enabled me to stamp the flower heads, so they would fit within the frame, in Smokey Grey versafine ink 
  • Using temporary adhesive to hold frame in place, I stamped the outline stamp in black onyx versafine ink, directly onto the card blank, ensuring part of it stamped onto the frame. I also stamped part of the flower coming down from the top left corner 
  • I inked up the solid stamp with my kuretake clean colour pens, spritzed with water and stamped it over the outline images
  • I removed the frame, and re adhered it using foam pads
  • To complete I stamped the sentiment in black onyx versafine 
Many thanks for popping by and I hope you enjoy your day

Crafty hugs xx 

Thursday 3 August 2017

DT samples for the new Time products by Bee Crafty

Good morning xx

How is everyone?  Do we have a crafty day planned?

I'm back today with my weekly blog for
Bee Crafty

Following on from last week's blog I'd like to showcase the rest of my DT samples for the new Time products, recently released on Hochanda

Last week I showed the mdf makes, today I'd like to share the cards I made using the same products

Pocket Watch stamp
Cogs stamp
Key stamp
Ladies Profile stamp
TIME stamp
Time Flies stamp

Also used:
Distress Oxides
Black onyx versafine ink
Inkables Tempate: Circles
Dinkable : Chain link
Versmark ink
White embossing powder
Pixie Powders  (you can also use Brushos)


  • I cut some teal paper slightly smaller than my card blank and white card slightly smaller than this 
  • The Pocket Watch was stamped in black onyx versafine ink, onto the white card, and masked off
  • I used Peacock Feathers and Fossilized Amber Distress Oxides through the Circles and Chain Link stencils
  • The cogs were then stamped in the same Distress Oxides 
  • I removed the mask then stamped the TIME part of the stamp on the right hand side of the white card 


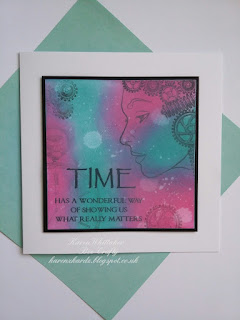
  • For this sample I cut a square of black card and a slightly smaller square of white card 
  • The Peacock Feathers and Picked Raspberry Distress Oxides were blended across the white card, spritzing with water and drying in between each layer of ink 
  • The Ladies Profile and the Cogs stamps were inked up in the black onyx versafine ink and stamped onto the blended background 
  • I second generation stamped the Pocket Watch in the lower left corner to get a more muted image, which sits in the background 
  • The sentiment was also stamped in the black onyx versafine ink to complete  


  • For this sample, I cut a square of black card and a slightly smaller square of white card 
  • The Pocket Watch was stamped in Versmark ink and heat embossed in with white embossing powder 
  • I used Pixie powders to create the background 
  • The sentiments were stamped in black onyx versafine ink, masking it off to split the sentiment into two separate stamped images


  • To create this sample, I cut a panel of black card and a slightly smaller panel of white card, to fit vertically down my card blank
  • The keys were stamped in Wilted Violet, Fossilized Amber, Worn Lipstick and Picked Raspberry Distress Oxides 
  • Using the panel as a guide, I stamped the Pocket Watch so it would sit under the panel
  • I adhered the white card panel onto the card blank with TEMPORARY adhesive, stamped the TIME sentiment over both the panel and the card blank and then I removed the panel
  • The white panel was adhered to the black panel and the adhered to card blank,  ensuring the sentiment stamp lined up perfectly 
I really hope you've enjoyed seeing my first DT samples, showcasing the new Time products on Hochanda 

I'd love you to leave me some comments,  I do read them all.

Thankyou for stopping by and I'll be back with more samples for Bee Crafty next Thursday 

Crafty hugs xx